Life Through Lynsey's Lens
A blog about travel, photography, and all the life in between
Life Through Lynsey's Lens
A blog about travel, photography, and all the life in between
A blog about travel, photography, and all the life in between
A blog about travel, photography, and all the life in between
Milky Way 101
How to photograph our home galaxy from here on Earth
Growing up in the suburbs of a major metropolitan area like the Twin Cities, I didn’t have a lot of opportunities for stargazing. I can honestly say that, as an aspiring aerospace engineer, I didn’t really spend much of my childhood doing any actual stargazing. I just knew that space was cool and assumed that it was all up there where it was supposed to be (there wasn’t much to see beyond the Big Dipper, anyway). But I digress.
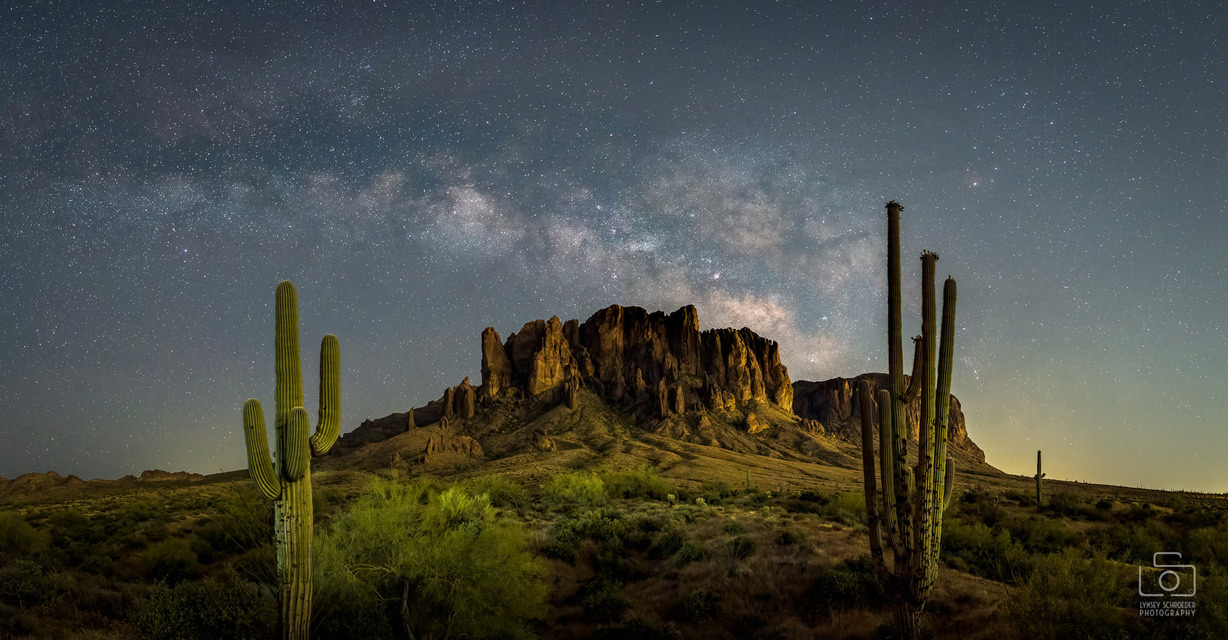
I remember the first time I saw the Milky Way–our home galaxy–up in the night sky. It was during my internship with the SETI Institute back in the summer of 2014, while we were spending a week at the Hat Creek Radio Observatory in northern California. Those were probably the darkest skies I had ever been under at the time, by a long shot. It was “can’t see your hand in front of your face” dark. Bortle 2, if you want to get technical (which, I just looked up now, and actually I’m kind of surprised it’s not B1). We were out there with Dr. Jill Tarter, who had promised to point out the Milky Way once it got dark enough. It definitely blew my mind. That’s when I really fell in love with the night sky, and I bought my first DSLR camera about a month later. I wanted to photograph it.

As much as I can sit here and reminisce about my days working for SETI, I promised you a tutorial. So, you’re probably wondering, how do you photograph the Milky Way? It’s actually not as difficult as you might think
Equipment
I’m going to preface this by saying that I’m not really going to be talking about “minimum” requirements here. Yeah, you can probably take a picture of the Milky Way with a point-and-shoot or a cell phone if you put it on a tripod and dial in the right settings, but you’re not going to get great (possibly not even good) results. So I’m going to write this article more from my own recommendations, not what’s technically possible.
Camera. First things first, you’re going to need a fairly decent DSLR or mirrorless camera. Ideally you want a full-frame because you’ll collect more light, but you could get away with a mid-range crop-sensor (APS-C) model, especially if you have a good lens to use with it. I took my first Milky Way shots with the Canon 60D, which is a crop sensor. I’m not going to list specific camera recommendations here because there’s so much to consider beyond what’s covered by an introductory guide, but please feel free to reach out in the comments or by email and I’d be happy to talk in more detail and help you pick one out.
Lens. You’re also going to need a wide, fast lens. Ideally you want an aperture of f/2.8 or lower, though you can get the job done with f/3.5 (I shot my first Milky Way with the 18-55mm f/3.5 kit lens that came with my camera). Focal length tends to be a matter of preference, but typically you want something around 30mm or less. A big thing to keep in mind that if you have a crop sensor camera there will be a focal length modifier, so, for example, that 18-55mm lens on my Canon 60D was the equivalent of a 29-88mm lens. (Canon’s crop factor is 1.6x. I believe Nikon’s is 1.5x but don’t quote me on that.) This is going to become very important in the next section when we start talking about exposure time.
Here are a few of my favorite Milky Way lenses, and their prices at the time of writing:
And a few that I haven’t used personally, but my friends do:
Disclaimer: Nobody’s giving me any money to recommend these lenses (it’d be cool if they did though). Nor do I receive any money when you click on those links. Nor do I get any money for linking to B&H. 100% my opinion, 0% making money.
Tripod. The sturdier the better. I’ve had good luck with my Vanguard Alta Pro, but as long as it holds your camera up you’ll be fine (just watch out for the wind).
Cable Release / Remote. Finally, you need to be able to trigger your camera without touching your camera–no matter how softly you press the shutter button, it will shake the camera and cause your long exposure to blur. A lot of cameras these days have built-in WiFi to connect to an app on your phone, but I prefer a good ole fashioned cable release. I like this one because I can set it up to do intervals and stuff, rather than it just being a button on a wire.
You’ll also probably want a headlamp (ideally one with a red light, so that you don’t kill your night vision when you turn it on), and plenty of batteries and SD cards.

So now you have your camera, lens, tripod, and you’re ready to get out under the night sky.
Settings
The first thing you’re going to do is set your camera to “Manual” mode. In order to get a good shot of the Milky Way, you’ll need to have a decent understanding of exposure time (shutter speed), aperture (f-stop), ISO, and how they all work together. This is something that you can practice with in daylight too, so if you’re used to keeping your camera on automatic (the handy green box icon that sets all of your settings for you) this will be new territory. You’ll also want to shoot in RAW mode, not JPG, so that you have plenty of data to work with in post-processing.
Start with your aperture, which is going to be limited by your lens. Ideally you want this as low as possible to let in as much light as you can. However, I don’t personally like the results at anything lower than f/2.0 so I try to limit it there, or use f/2.8 if I can. (There’s more to aperture than just how much light gets in, but I won’t go into it in Milky Way 101.)
Next comes your focal length, which is also determined by your lens. This is something you can’t really change, or at least can’t change much. Your choice of focal length will also play a role in your exposure time, which determines how much light the camera collects (astrophotography is all about that precious light!) One of the reasons you want a wider lens for Milky Way is to reduce star trailing. As the Earth rotates on its axis, the stars appear to move across the sky, and if you set your exposure time too long you’ll see the movement of the stars. Sometimes this is the goal, but usually with Milky Way shots you want nice pin points of light in the sky. How long is too long? We use something called the 500 Rule to figure it out. 500 divided by your lens’s focal length gives you the maximum exposure time without trailing. And don’t forget the crop factor.
For example, if you have a 15mm lens and a full frame camera, 500 / 15 is 33 seconds. But with a 18mm lens on a crop sensor camera, 18 * 1.6 is 29 and 500 / 29 is only 17 seconds. You do need to take this rule with a grain of salt, and I actually prefer to subtract about 3-5 seconds from whatever it gives me. I’ve found that 20 seconds is the sweet spot for anything between 15mm and 30mm, and then I bump it down to 10 seconds if I’m shooting a narrower lens like 50mm.
Finally, with aperture, focal length, and exposure time set, it’s time for ISO. My rule of thumb for ISO is to keep it as low as you can get away with, and for Milky Way that tends to be somewhere in the 3,200-6,400 range. High, I know. It really depends on how well your camera can handle high ISO without getting too grainy. On a crop sensor you might not want to go above 800 or 1,600 before the image starts to really lose quality, whereas a mirrorless camera might be able to handle 12,800 and still look nice. I’d say start at 3,200 and adjust up or down depending on how it’s looking.

One final setting to set would be your white balance, although if you’re shooting in RAW (which you should be) it doesn’t matter too much. I prefer a cooler white balance when I’m shooting at night, so I’ll set mine to something between 3500 and 4000 K. But this can always be changed later when you edit the photos, all it does is affect how the image looks on your screen.
Shooting
Now you have your camera all set up outside at night, you’re under some nice dark skies, no clouds, and you see the Milky Way in front of you. All ready to go!
The first thing you need to do is focus your camera manually to infinity, so make sure you turn off AF (the switch is usually on the lens). The easiest way to focus for astrophotography is to find a really bright star or planet (I like to use Jupiter because it’s in the same area of the sky as the Milky Way and it’s nice and bright) and point your camera at it–don’t worry, you’ll move back to the Milky Way composition after you focus. Then, on your camera’s screen, zoom in (don’t adjust the zoom of the lens!) so that the star gets bigger on the screen, and turn the focus ring of your lens until it the star becomes as small as possible. You don’t want to just turn the focus ring to the infinity marker because that marker is more of an estimation and varies lens-to-lens. You won’t need to refocus again as long as you don’t bump your focus ring or change your focal length. Now you can point your camera at the Milky Way, plug in your remote trigger, and get shooting!
Another tip, which I actually learned the hard way, is that if your lens has image stabilization make sure it’s off. It is most likely a switch on your lens that says IS or OS (Sigma) or DC (Tamron), or it might be a setting in your camera body (I believe Sony does this). You want it all the way off. The reason for this is because when the camera is on a tripod, the image stabilization algorithms are trying to account for motion that isn’t there, and you end up with wiggly stars.
And that’s it! Now you know how to photograph the Milky Way.
Conclusion
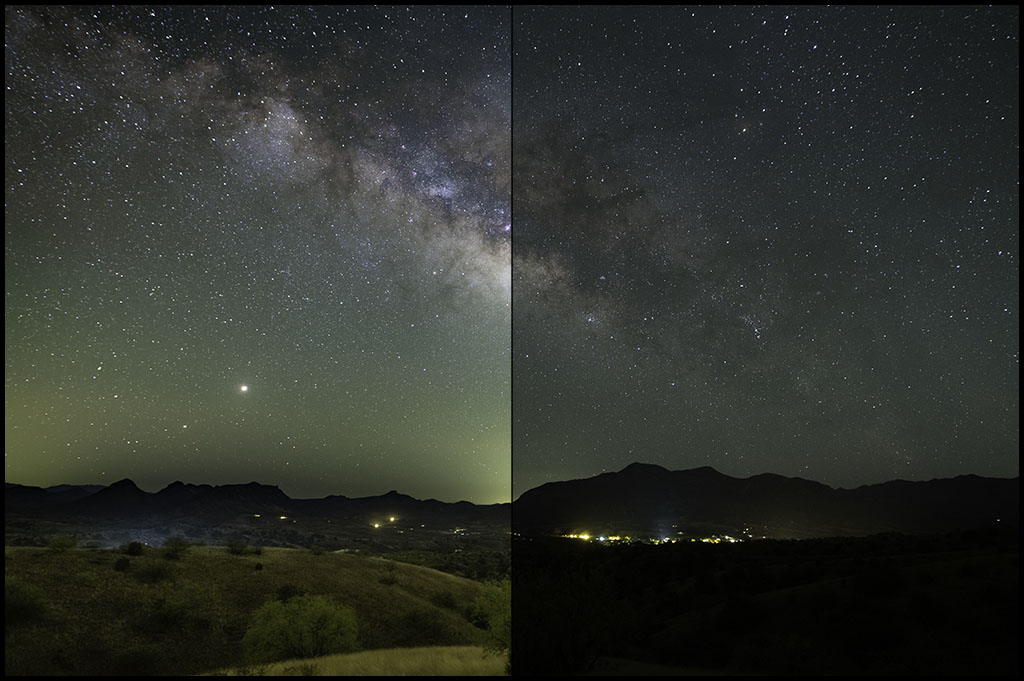
I will leave you with a few bonus pieces of advice. Rule 1 is always safety, especially when you’re out in the middle of nowhere at night. The hunt for dark skies will take you away from towns, people, and often cell signal. It’s always best to make sure that somebody knows where you are, and better yet to bring a buddy with you. Second, keep an eye on the moon. If the moon is full or even quarter, it will wash out most of the Milky Way detail–you’ll get your best results if you’re out during New Moon or before/after the moon rises/sets. And finally, don’t expect your photos to look fantastic in the back of the camera. Yes, you’ll see the Milky Way, but it won’t look like much. Post-processing is a must. But that’s a topic for another article!
I hope you’ve found this tutorial helpful! The comment section is open so leave your questions and I’ll be happy to answer them.